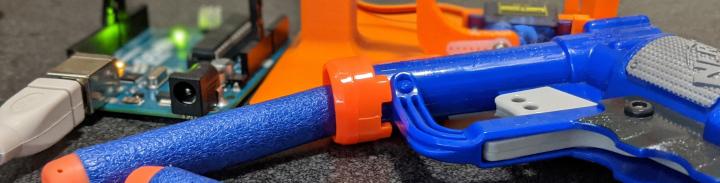
This weekend project starts with my 5 year old, as so many do these days. Armed to the teeth with NERF guns, we we’re shooting the evil toilet paper rolls off the coffee table. When we had cleared the table of targets, I asked my son to set the targets up again. He had quickly done the math and decided the return on investment was no longer worth it. He replied “Ugh, I don’t want to. This is boring now!”
I certainly wasn’t going to stand up the toilet paper rolls for another round. The writing was on the wall; it was time for a robot!
Goal
When I shoot the target, it should return itself to its original position.
Requirements
- Minimal number of parts
- Trivial to use
- Code so simple I can write it while my 5 year is asking if it’s done yet
Mechanical Design
I’m not well versed in mechanical design, but I’m plenty familiar with circuits, motors, and embedded software. After a little while of learning more about applying servo motors, I was able to create a working 3D model in Autodesk Fusion 360
While it took me a much longer to make the full model, it saved me a lot of time in troubleshooting bad parts, making small adjustments, and reprinting. I had less than 2 grams of wasted reprints and all the parts fit as designed.
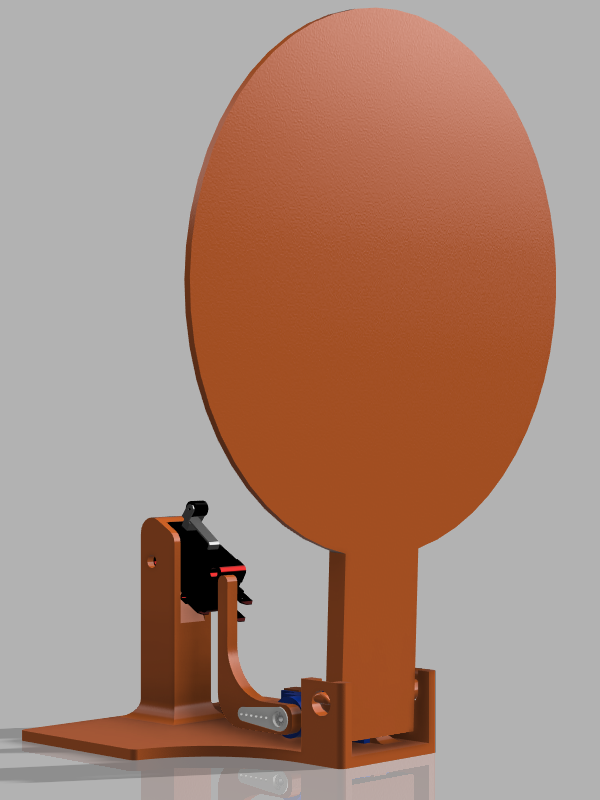
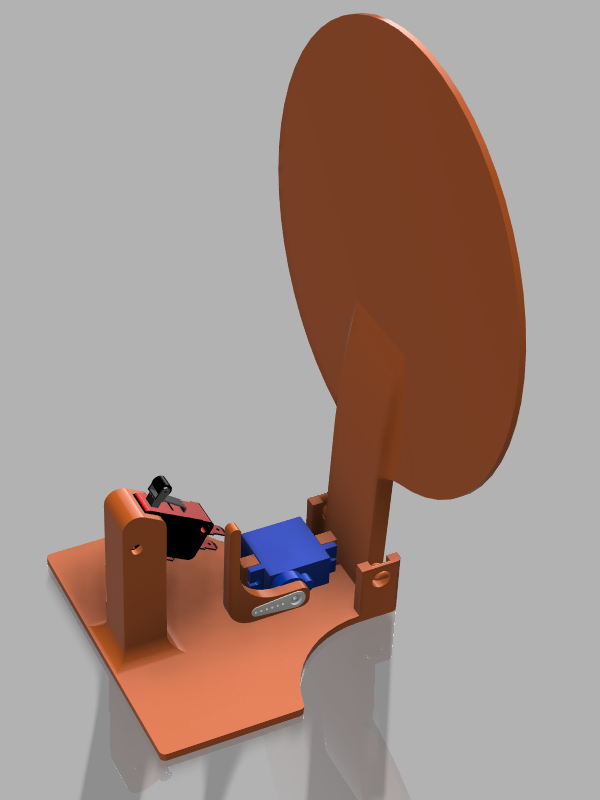
Back 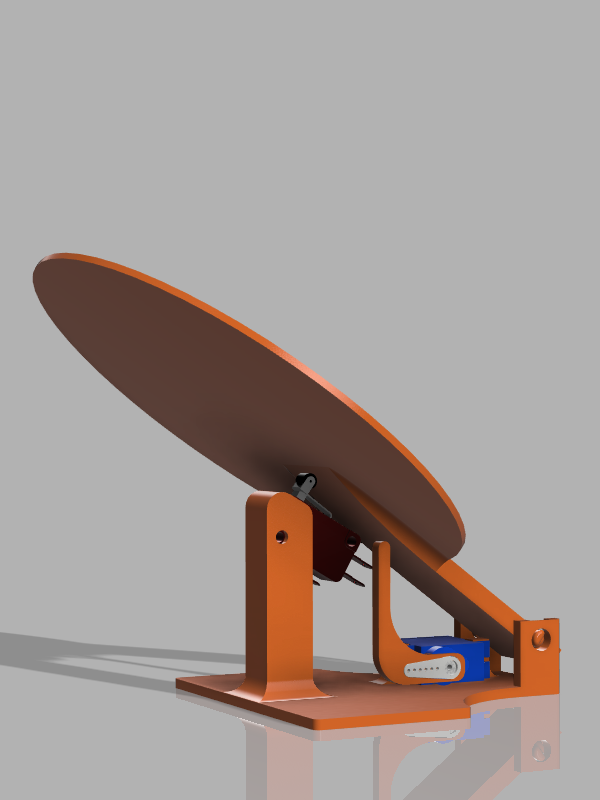
Target Hitting Switch 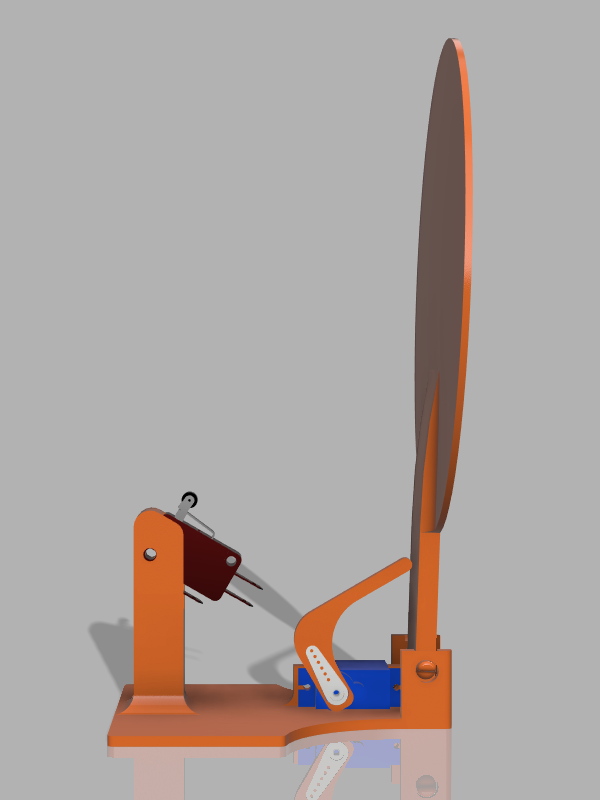
Servo Arm Lifting Target
Circuit Design
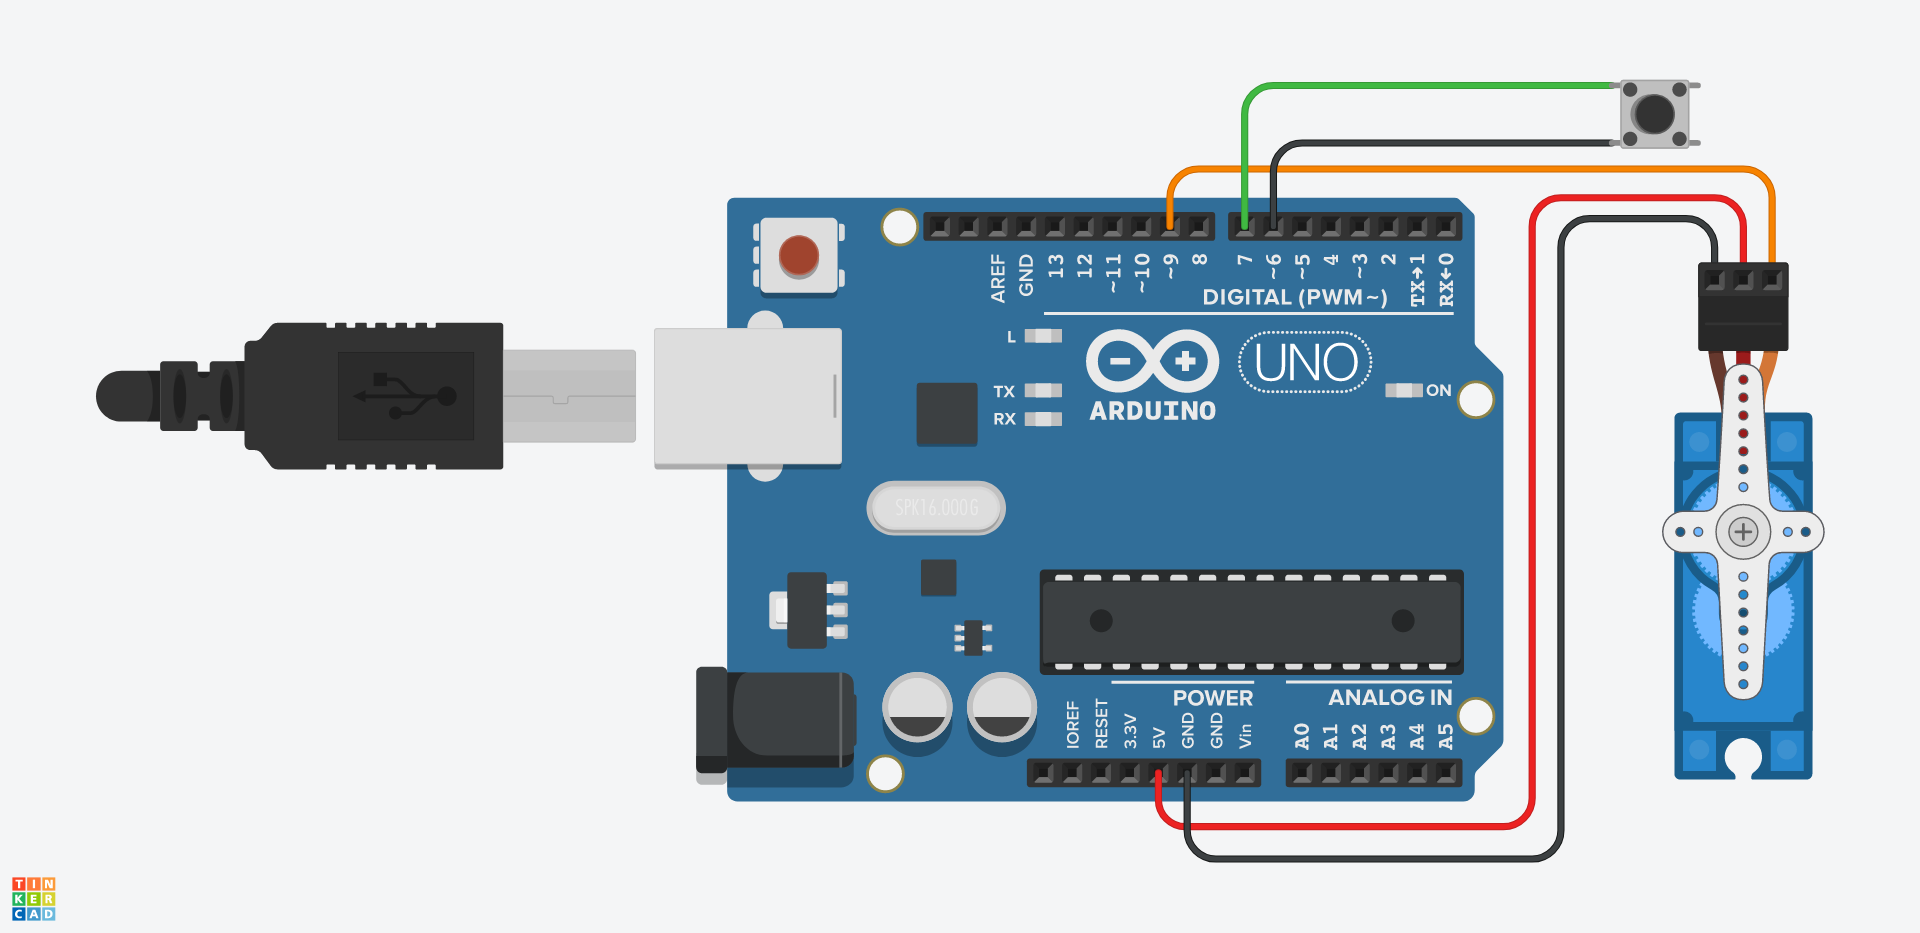
The circuit needed to be simple enough that my son could help me put it together. I didn’t want to involve an extra breadboard or passive components. With a single switch and servo, this was pretty easy.
If you head over to Tinkercad, you can recreate my design and put the code in to see it simulation. Very cool resource!
The Code
Ah yes, the code. It needed to be very, very basic. As in — “Have you ever had a 5 year old playing in your office, asking if something is done, and waiting with a loaded NERF gun?” — simple.
#include <Servo.h>

const int PIN_MOTOR_SIGNAL = 9;

const int PIN_SW_SIGNAL = 7;
const int PIN_SW_GROUND = 6;

const int DELAY_BEFORE_LIFTING = 1000;    // Let the target stay down. Helps to see that you hit it.
const int DELAY_HOLD_TARGET_UP = 700;     // Critical! After the motor lifts the target, this delay helps the settle and prevents it form bouncing back down.

const int POSITION_LIFT = 15;
const int POSITION_START = 90;

Servo servo;

void setup() {
  servo.attach(PIN_MOTOR_SIGNAL);
  servo.write(POSITION_START);

  pinMode(PIN_SW_GROUND, OUTPUT);
  pinMode(PIN_SW_SIGNAL, INPUT_PULLUP);

  digitalWrite(PIN_SW_GROUND, LOW);
}

void loop() {
  // Don't need to worry about debounce, if the signal ever goes low, run the servo
  const bool target_fell = digitalRead(PIN_SW_SIGNAL) == LOW;

  if(target_fell) {
    delay(DELAY_BEFORE_LIFTING);

    servo.write(POSITION_LIFT);
    delay(DELAY_HOLD_TARGET_UP);

    servo.write(POSITION_START);
  }
}
Video
Bill of Materials
In case you’re interested in the parts I used, I’ve provided links to everything. You’ll notice I like kits / sets of things. It can be really expensive to buy small sets of parts and spares are life savers.
- Arduino kit – I highly recommend these kits for anyone!
- Servo Motor – Includes a test controller, lots of wire, and an expansion board.
- Switch – These are the same used for arcade machines; super durable!
- M3 screw – You need 1x 20mm M3 screw with a nut.
- Spade Connectors – To connect to the switch.
What’s Next…
Now, if only we had 5 of them… and we could get points… and maybe we had to race against a clock…
I have a handful of these motors and switches, so I’m sure I’ll come up with something new when the single target gets “boring“.